Easy DIY soap bottle: Bathroom Organization Idea
Teen bathrooms can be a scary place right?!? Here’s an easy DIY soap bottle bathroom organization idea. The perfect project to add style and get that decluttering ball rolling!
When it comes to Teen bathrooms, organization is key! And getting rid of clutter so it’s easier on the eyes is a nice bonus.
My teen bathroom organization goal:
To get rid of the mishmash of products and busy labels end up with a clean and contemporary look for my boys bathroom countertop.
My budget friendly DIY soap bottle solution:
Repurposing inexpensive soap containers with new matching waterproof labels to add functional style.
Where to find an inexpensive soap bottle
Next time you’re at the grocery store or Winners, check out the selection of inexpensive soap and lotions bottles. I always keep an eye out for bottles that are the right size and shape for the space I’m styling (can you tell I’ve done this before? lol)
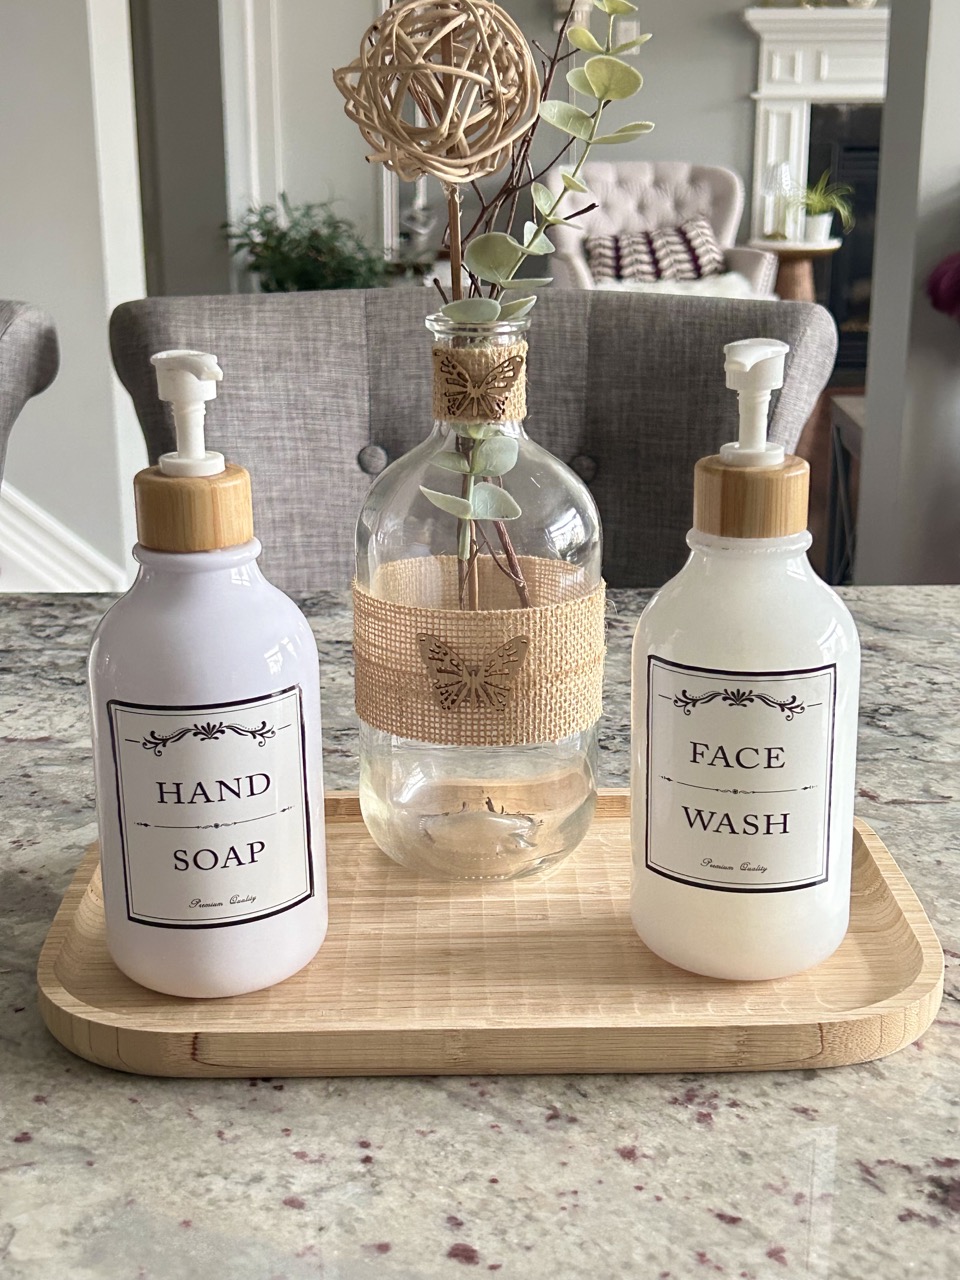
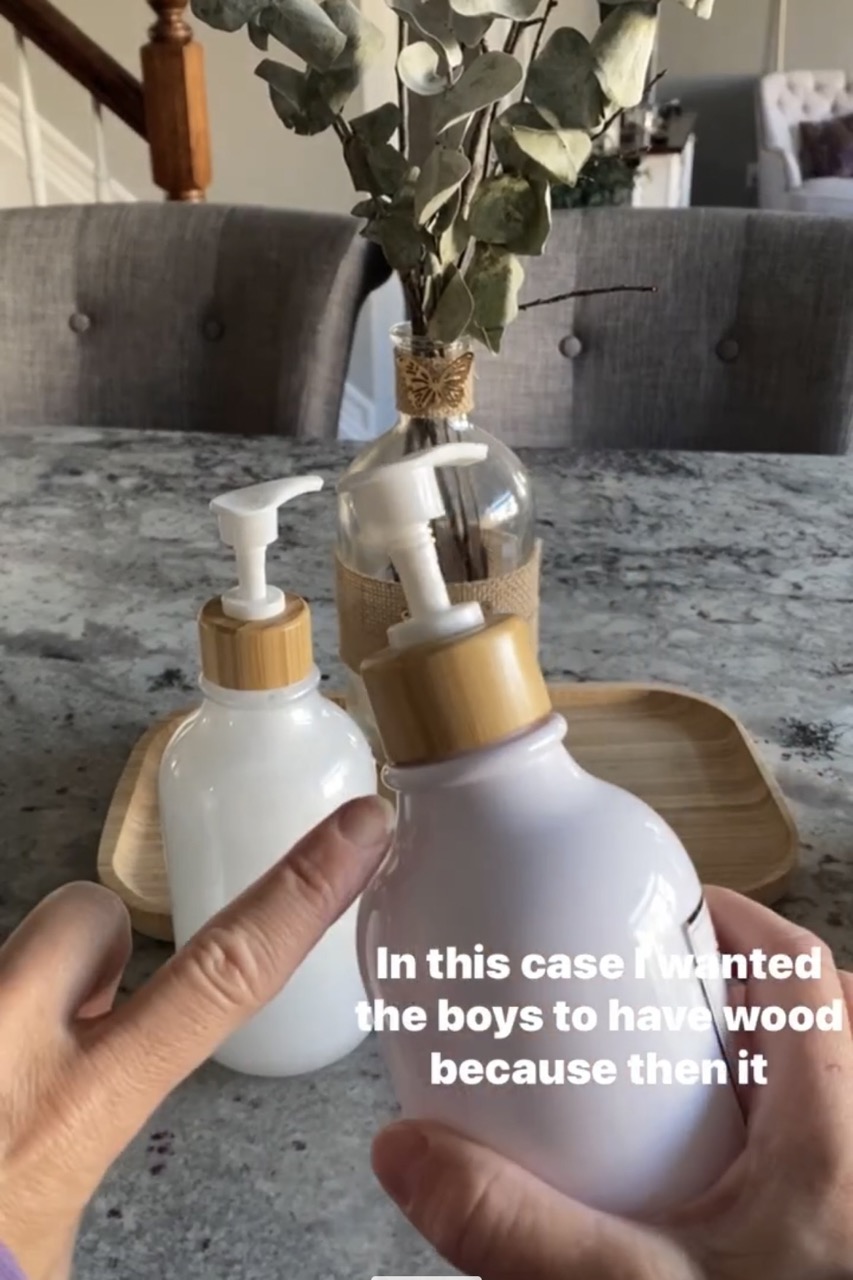
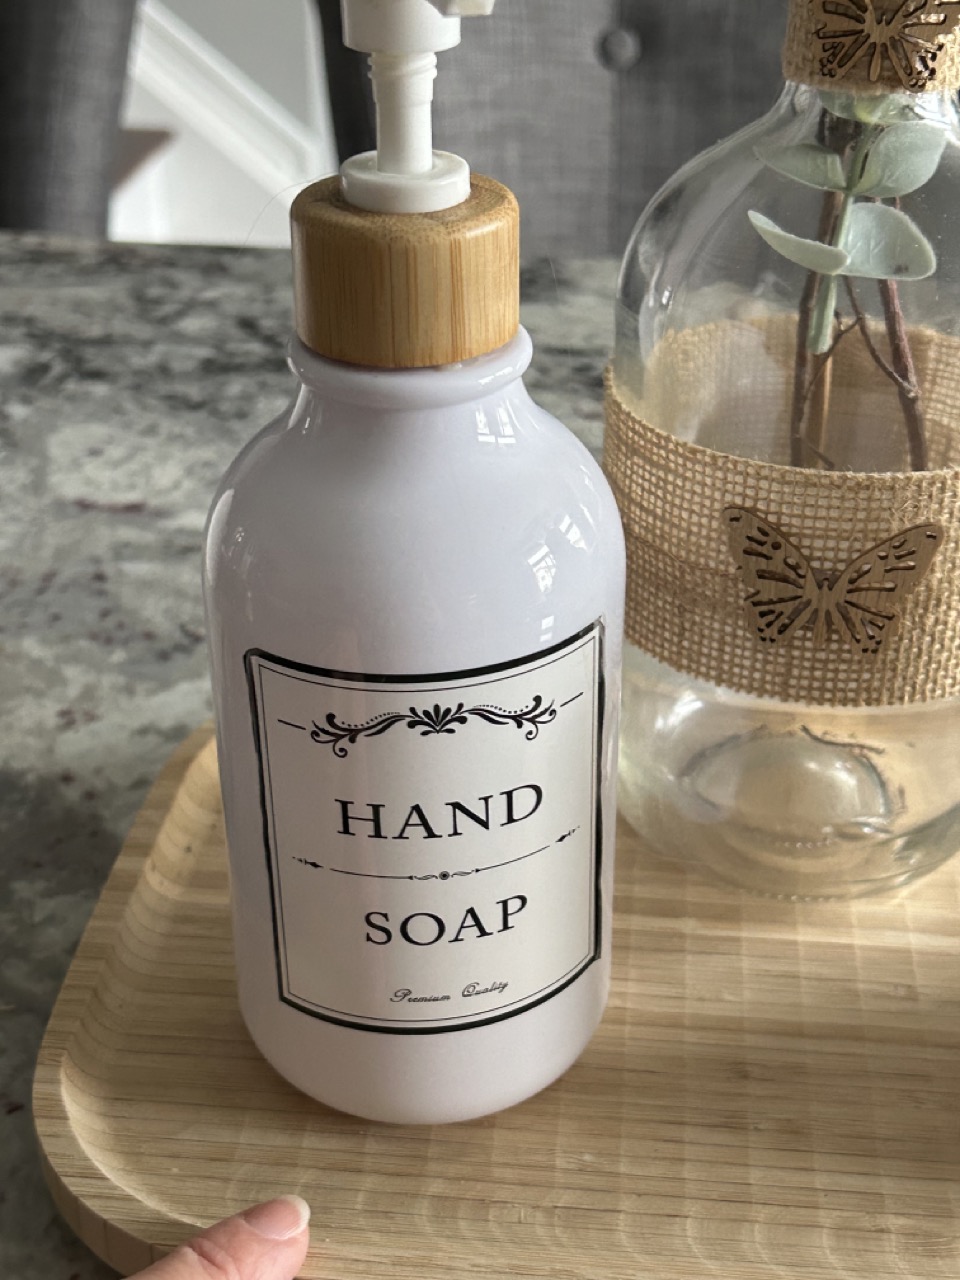
For this project, I found pretty plastic bottles with bamboo pumps ($6 each at Winners). The bamboo is such a fresh clean look when paired with the white bottle (bamboo pumps also look amazing on black bottles!)
Bonus tip:
Choose bottles with toppers that work with your style and decor and switch them up as needed. I’ve been known to exchange toppers between bottles I have on hand, by simply switching out the little plastic tube inside to match the correct length needed to dispense the soap properly.

Three Simple Steps: DIY soap bottle
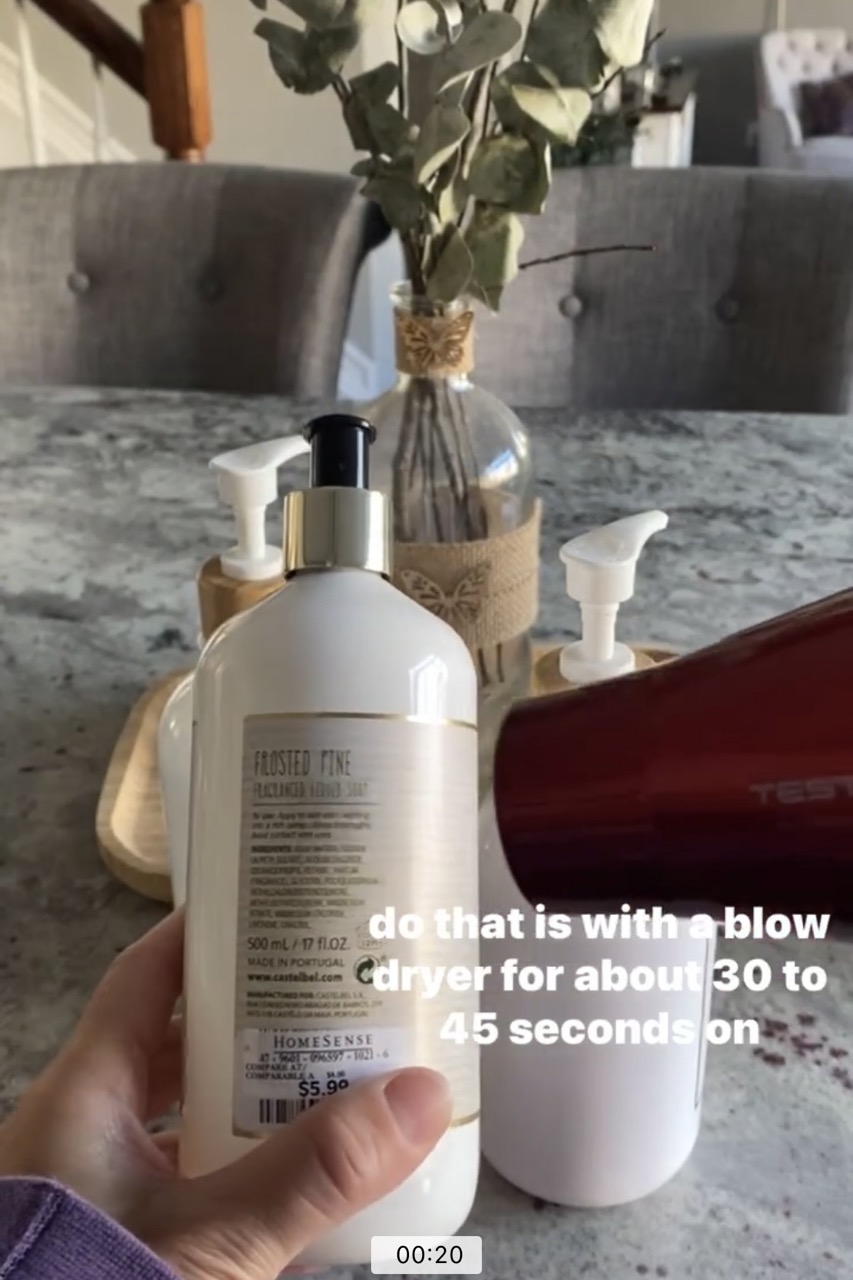
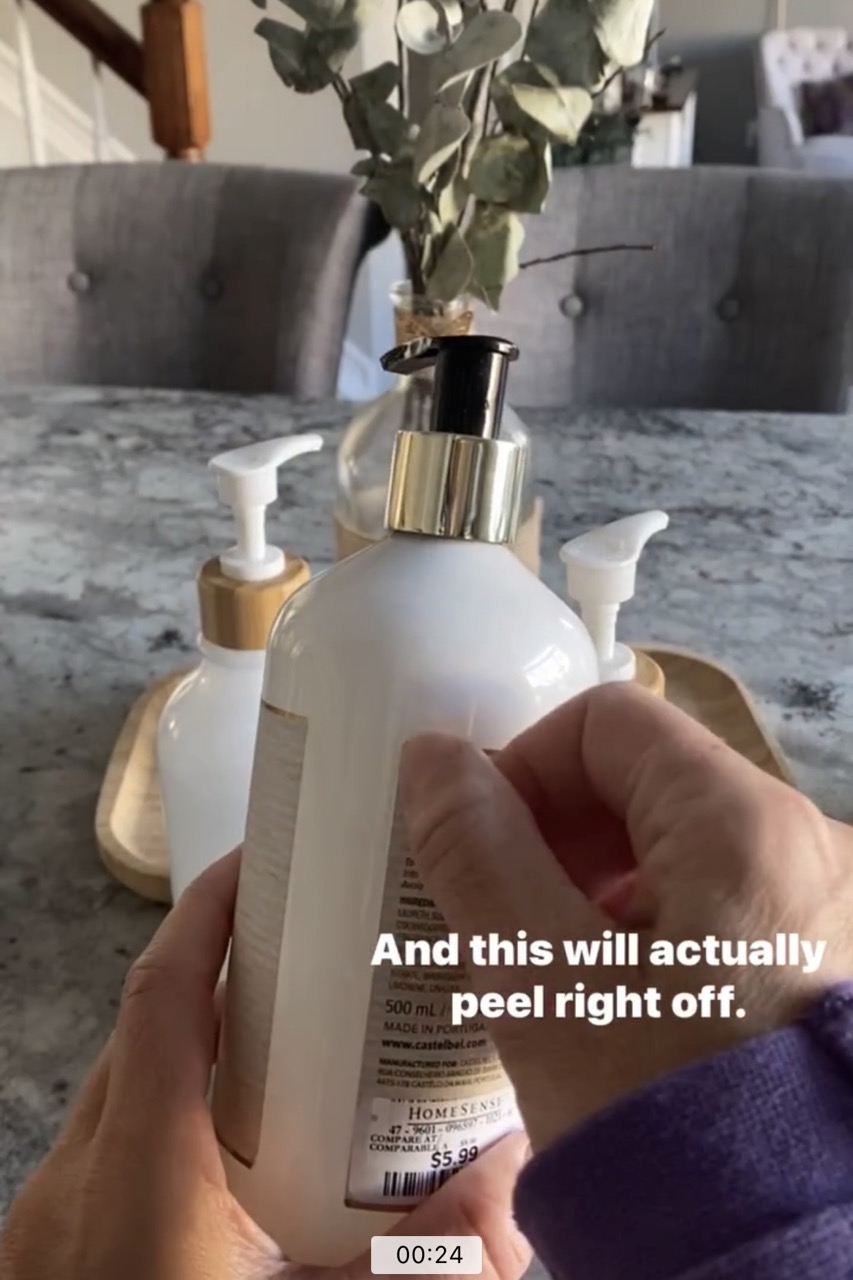
1. Remove the old label from the soap bottle.
Start by removing the old store label. This is easily done using a hairdryer on high for about 30 seconds then pealing it off. (Also a helpful trick for removing sticky price tags!) Then wipe off any remaining glue residue with rubbing alcohol.
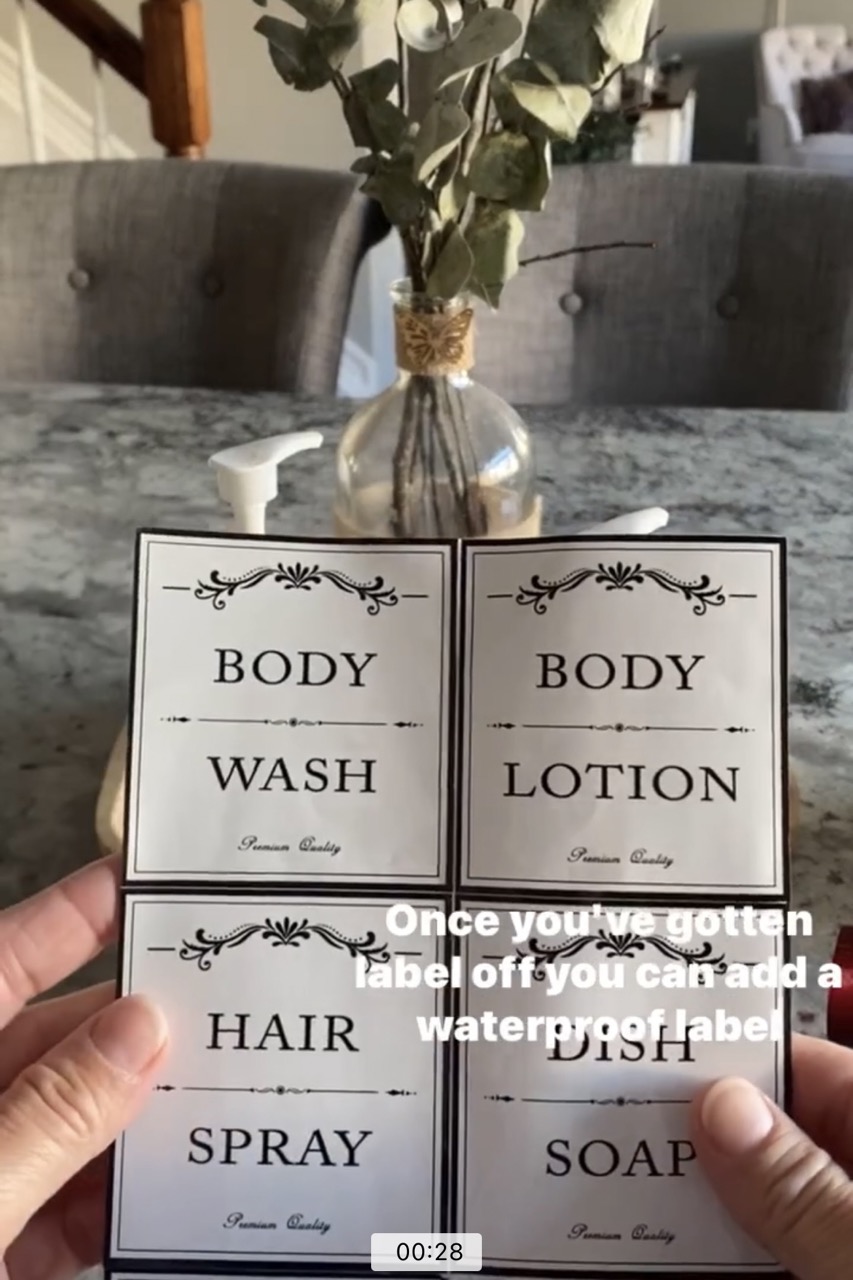
2. Add pretty labels:
Secondly, it’s time to add labels. I found this set of waterproof labels which provided me with lots left over for other projects (I’m looking at you laundry room!)
Alternatively, you could try chalkboard labels from the dollar store, for instance. (Note that these are not waterproof and the chalkboard marker ink may run over time.)
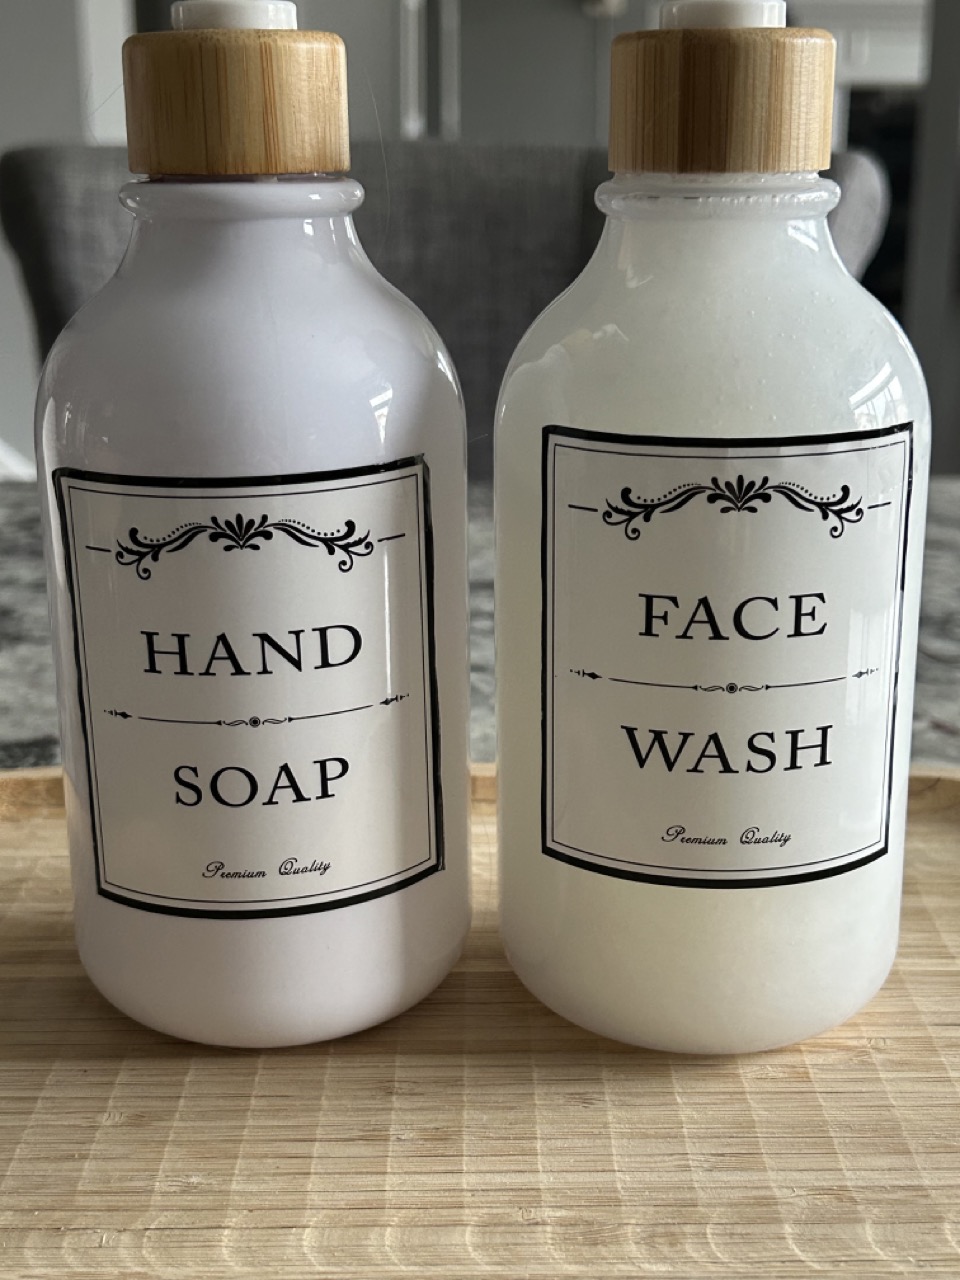
3. Clean and fill bottles :
The third step is to add the soap or cleansers to the newly labelled bottles.
In my case, I kept the soap in the first bottle and emptied and cleaned out the second one. The leftover soap went into a Tupperware (a refill for later) so that I could add their facial cleanser to the second bottle
Other soap bottle options I really like are these glass bottles with self adhesive labels
Bonus tip:
Adding a tray keeps the cleansers organized in one spot for a tidier countertop. (hint hint to my boys to keep the bottles on the tray! lol) For example, this bamboo tray from the dollar store complements the bamboo pumps and adds a cohesive and functional final touch.
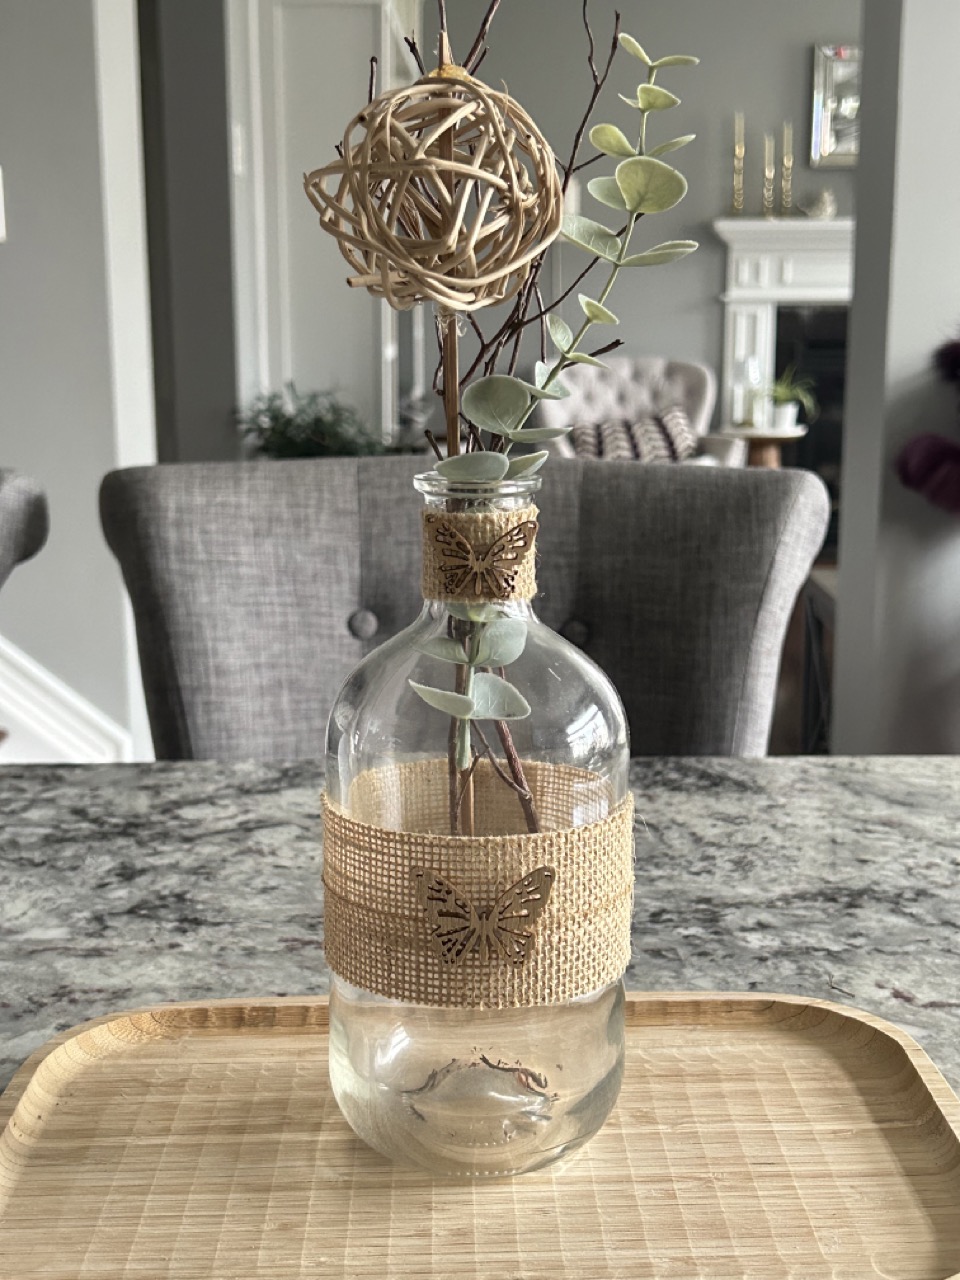
Because seasonal decor is always a great way to add pretty details, I finished off the look with a touch of Spring. (Some eucalyptus in a simple “vase” with burlap and butterfly supplies from the dollar store…Another DIY bottle repurposed-details coming soon 🙂
This is the second project I’ve done with DIY bottles. Check out my partner post; DIY detergent bottle idea for the laundry room.
Finally, I can walk into their bathroom and see a countertop that is clutter free. If only I can get them to hang up their wet towels…Baby steps, they are “works in progress” 😉
You might want to check out these other helpful bathroom organization ideas.
More Organization ideas
If you liked this easy DIY soap bottle, teen bathroom organization idea, you might also like these other Organization and storage solutions.