DIY Outdoor Kitchen Idea for backyard entertaining at its best
Hoping to enjoy dinner al fresco this season? Create casual meals on those warm summer nights, with our DIY Outdoor Kitchen Idea for the backyard.

When it comes to entertaining family and friends, having an outdoor space that’s both functional and beautiful is key.
For our backyard space, top of the list for my husband was some form of outdoor kitchen/food prep zone. A handy spot near the BBQ, where he could whip up easy summer meals.
Top 3 benefits of an outdoor kitchen
Ease of outdoor meal prep. Having an outdoor kitchen area means the cook is outside enjoying more time with family and friends.
And if they’re lucky, they might even get some help with food prep. (unless they’re married to me,in which case it’s safer for everyone if they deal with the food and leave the cleanup to yours truly). In addition, outdoor cooking means that food odors, grease and heat stay outside too!
Extends entertaining spaces. An outdoor prep zone allows for easier hosting (and serving!) of large gatherings. Furthermore, the extra space outside means that people can spread out and enjoy the relaxing backyard atmosphere.
Potential to increase resale value. Depending on the design features, outdoor kitchens can have a high rate of return on investment. Win win!
The DIY Outdoor Kitchen Design
Since I prefer to eat than actually cook, I sketched out a simple design that would give my chef all the function he needed along with all the pretty details I wanted.
Need to have. To begin, we made a quick checklist of what we needed. 1) a sink for rinsing veggies 2) a countertop for prepping pizza/burgers 3) some open storage on the bottom.
Nice to have. Not sure what features you want to include? Start by collecting images of bar carts and outdoor kitchen options from places like Pinterest and Houzz. In addition, you can even check out local home improvement stores for design feature inspiration.
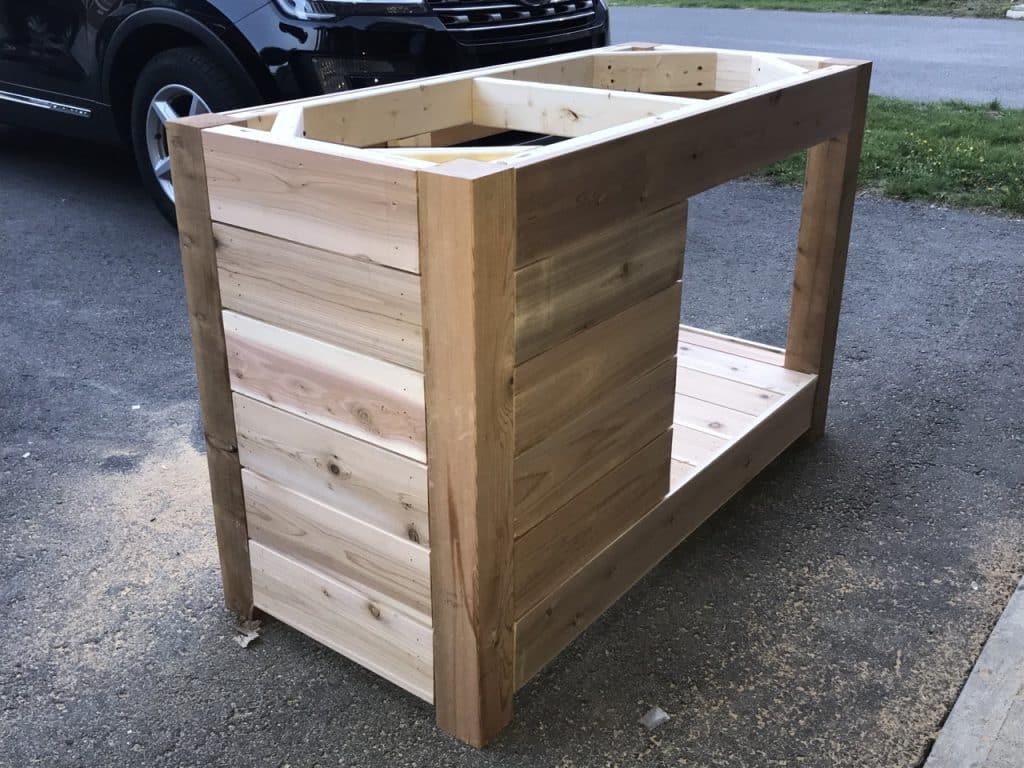
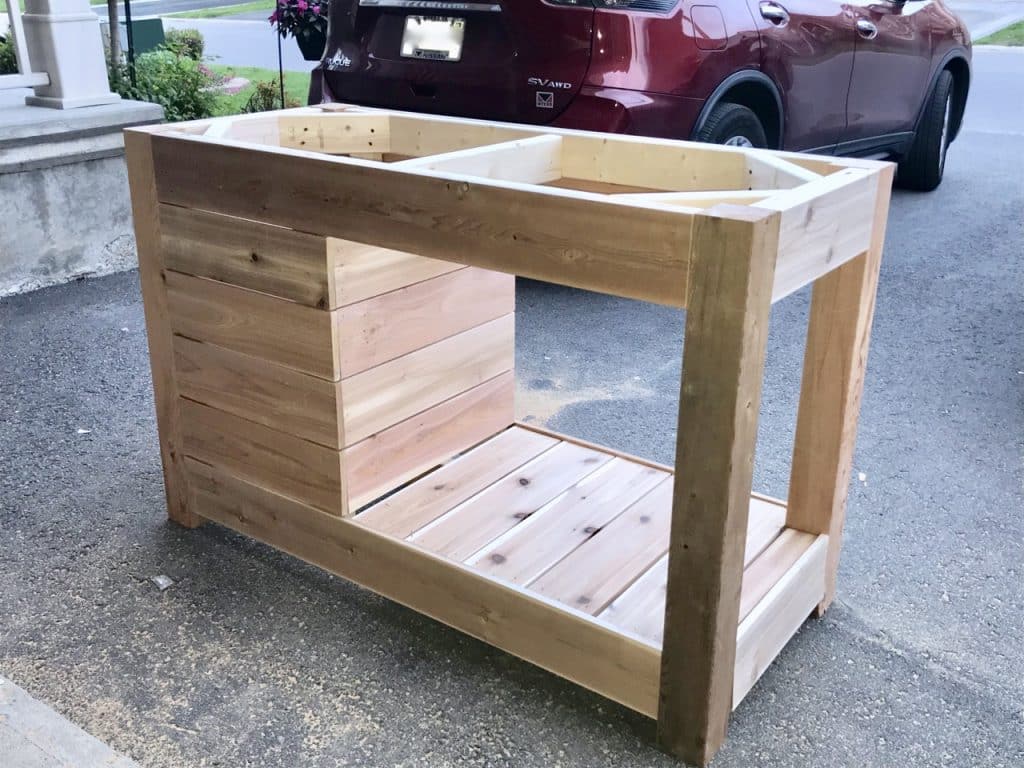
Building the outdoor kitchen base
The great thing about building it yourself is the ability to customize the look and features of the entire project. Because we only had 5′ of space to work with, a simple design just made sense.
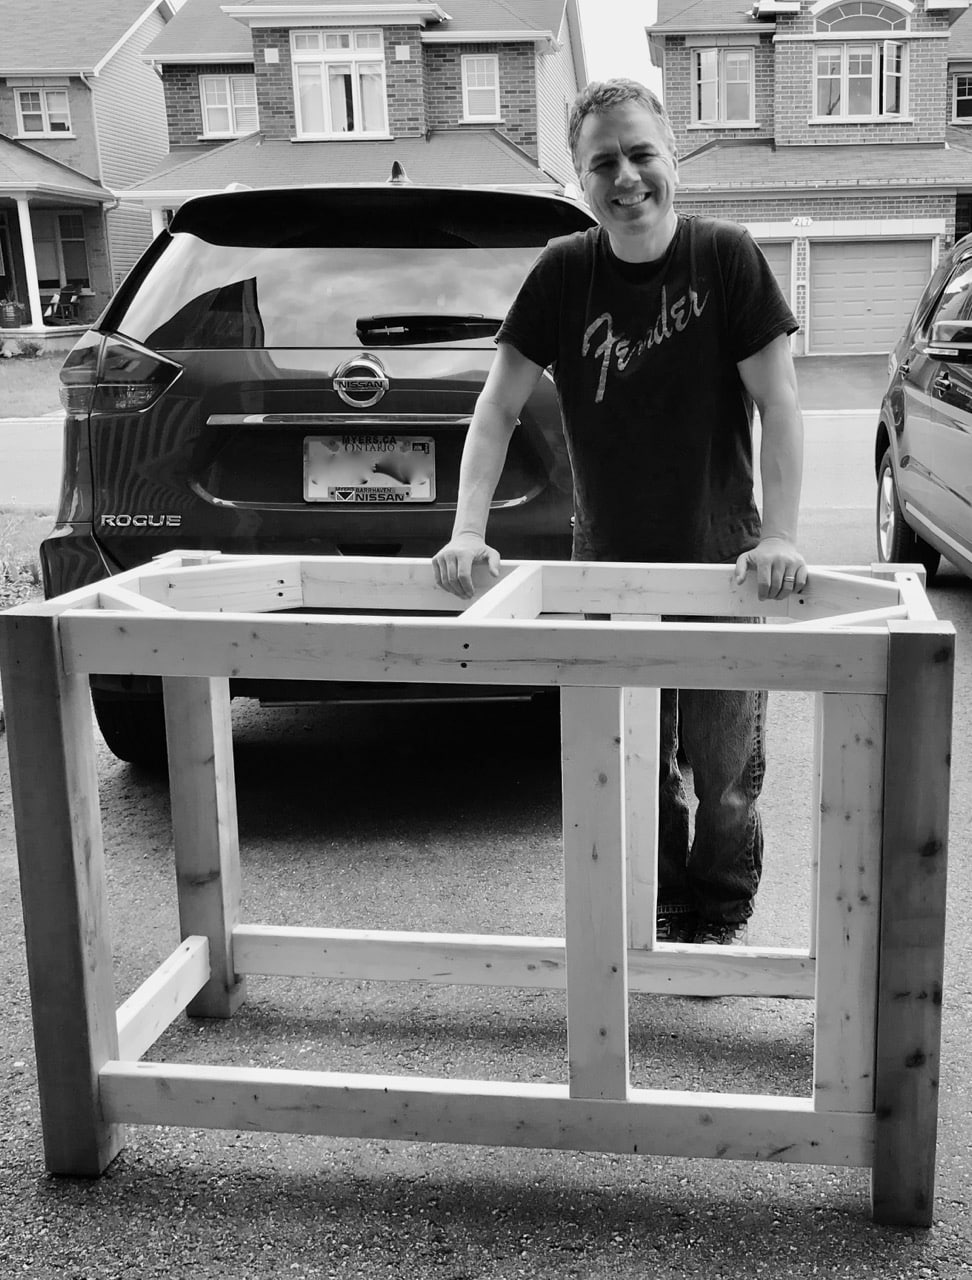
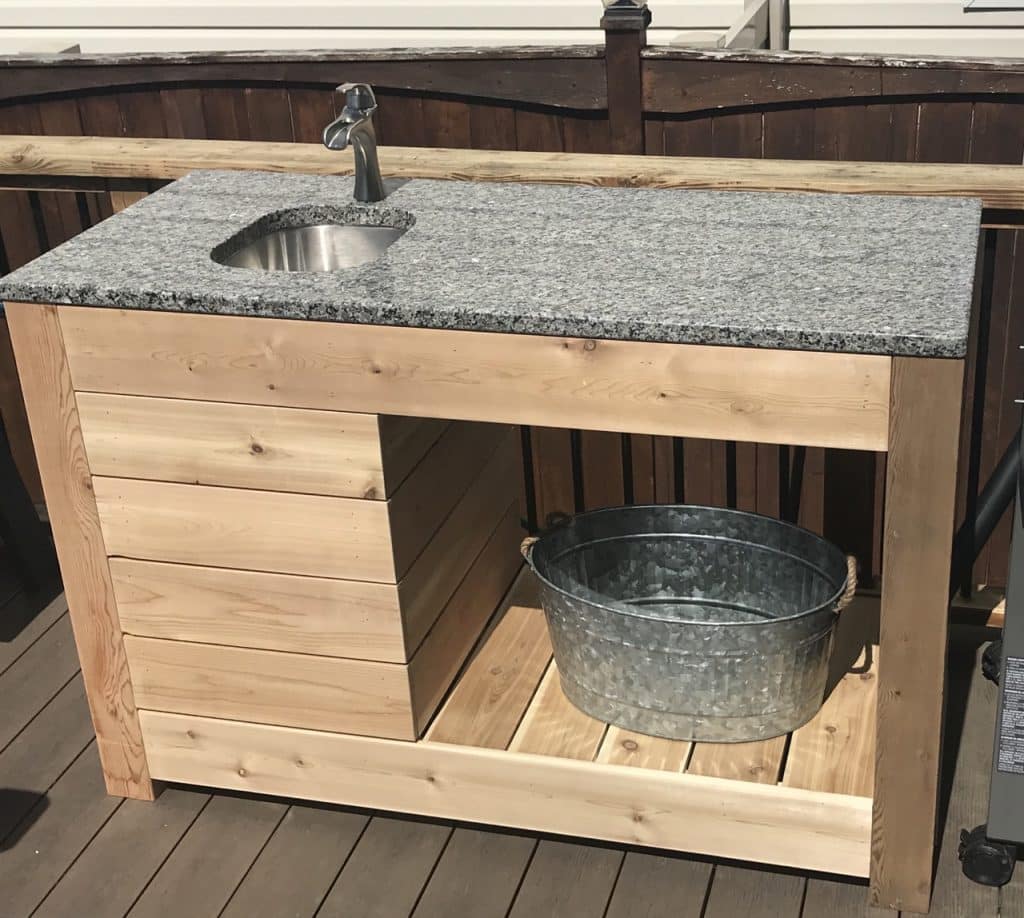
In order to accommodate the list of needs, it was designed in thirds. ⅓ for the sink area and the remaining ⅔ for the countertop and lower shelf storage.
To begin with, using four- 4″ x 4″ cedar posts and 2″x4″/2″x6″ boards, my husband constructed the rectangular base frame. Also, he added reinforcement at the corners and across the top to support the weight of the stone countertop.
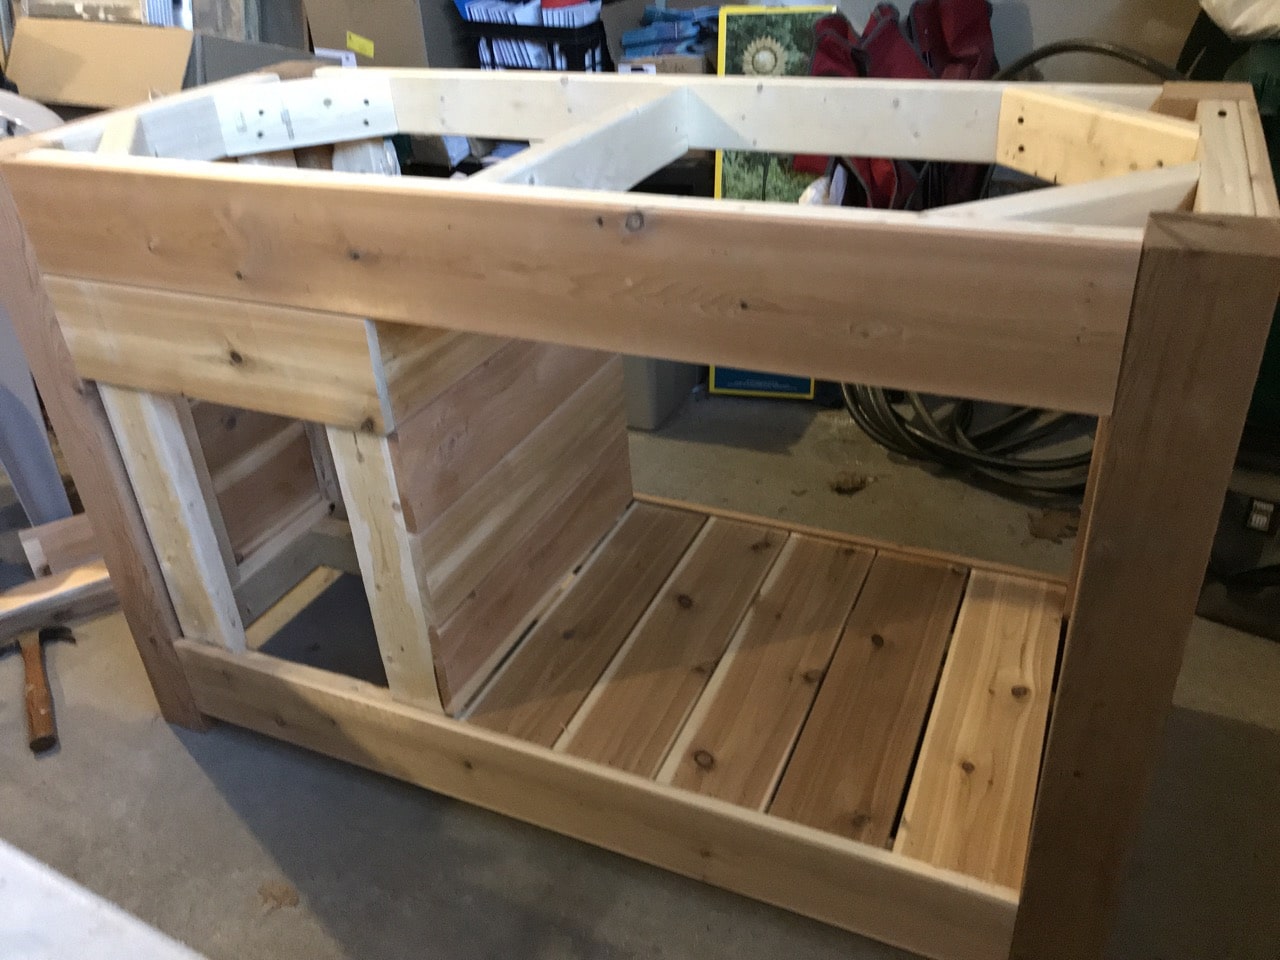
Next, he wrapped cedar boards on 3 sides around the sink area to hide the plumbing. The back was left open for ease of access to the hose and drain.
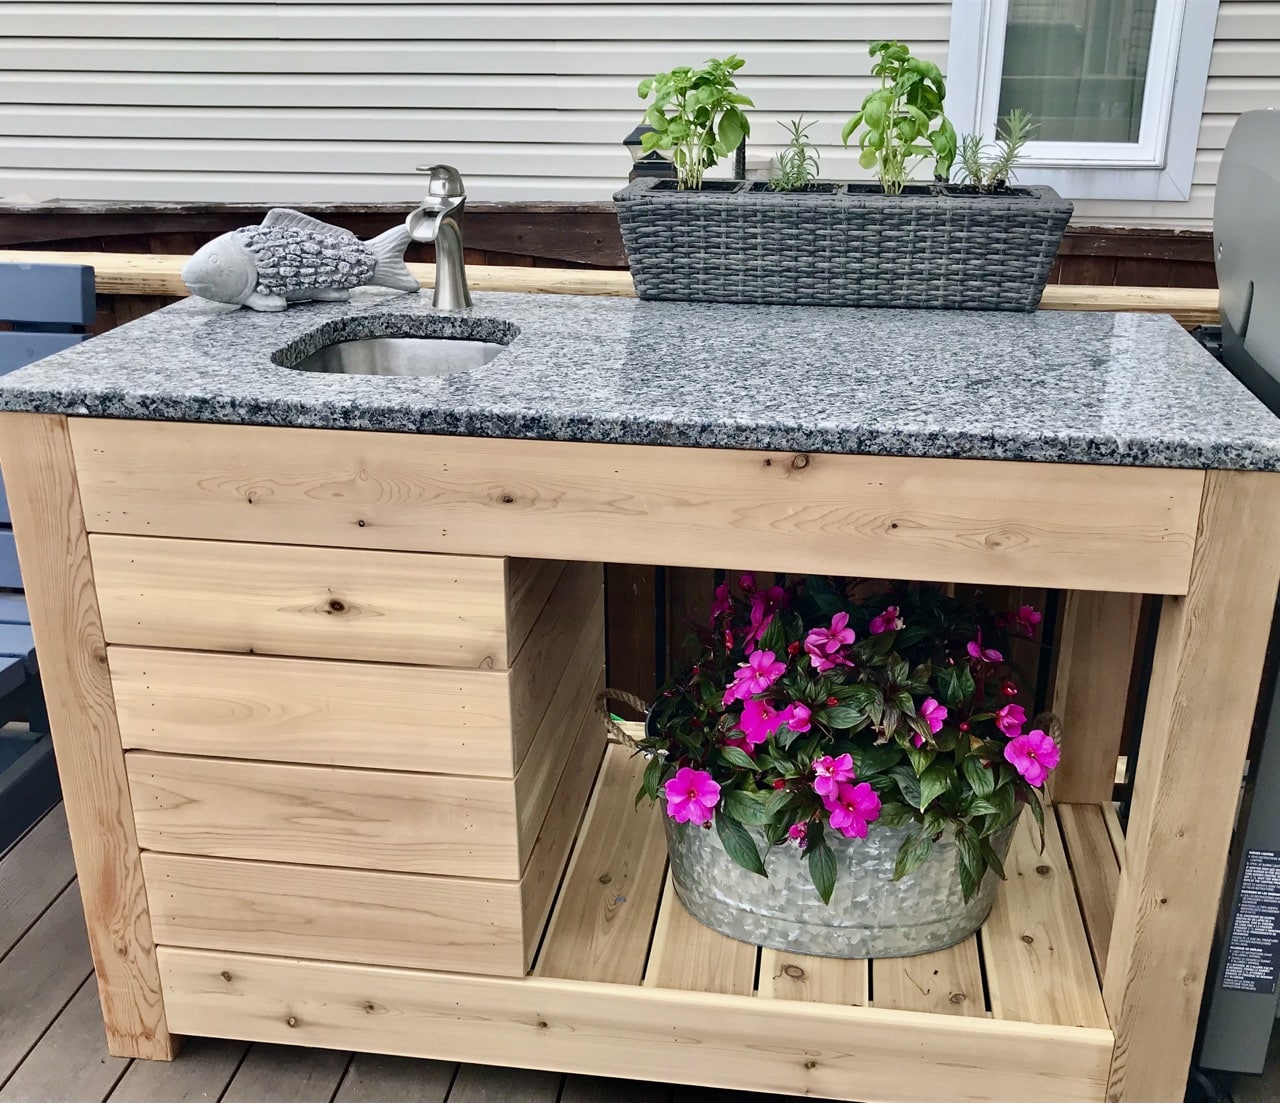
Finally, he attached cedar boards across the bottom to create a storage shelf. This provides a spot for flowers or the all important ice bucket of drinks for guests.
Choosing the countertop
Given our Canadian winters, we opted for a durable granite countertop. In order to keep it affordable, we found a remnant piece at a local granite shop. What’s more, they precut the holes for the sink and faucet we’d already sourced.
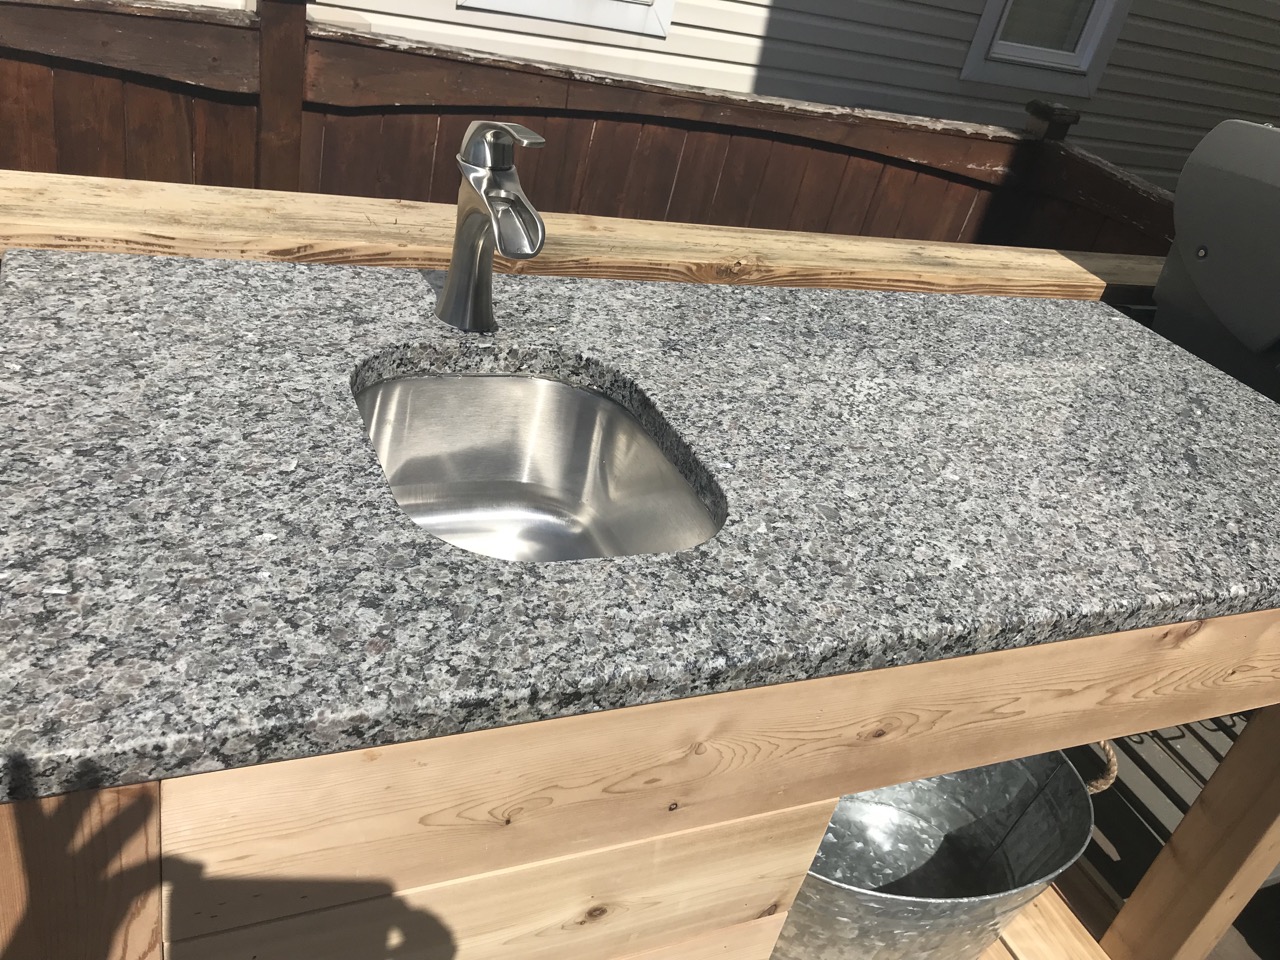
Attaching the countertop. In order to secure the granite to the base, we first applied construction adhesive then allowed it to dry as per product recommendations. You can find it at most hardware stores.
We spent around $500 for the perfect custom countertop for our project. We will definitely consider remnant granite options for future projects.
Adding the faucet/sink/plumbing
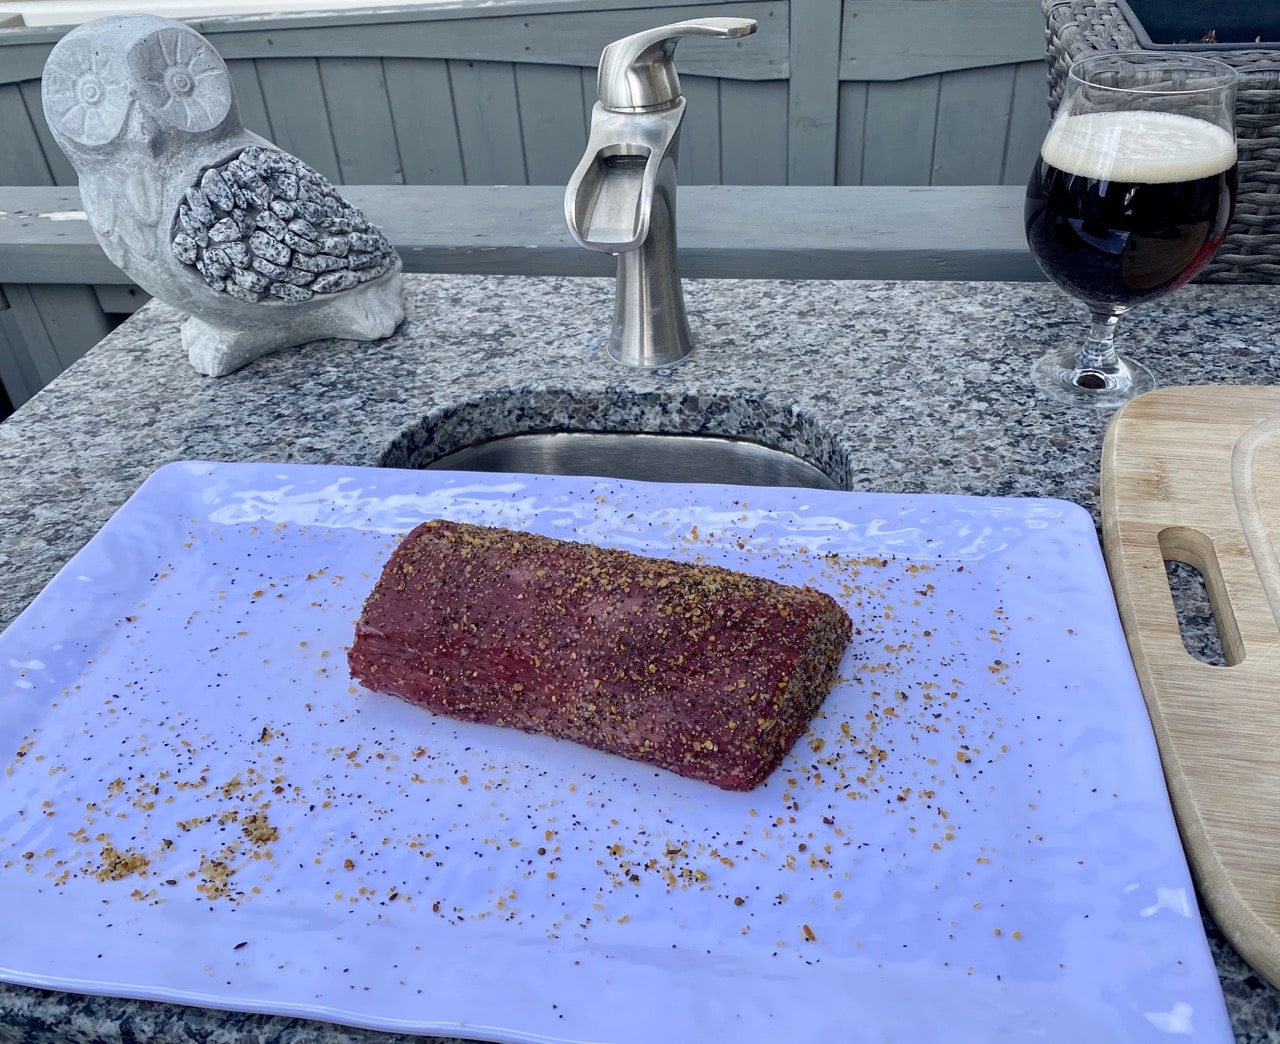
The Faucet. Because we wanted to minimize the number of holes cut into the granite, we chose a waterfall style faucet. Since the the handle is on top, it allows for easy one hand access for the chef. (or any guests with sticky fingers).
The Sink. In addition, to work with the various colours in the stone, we opted for a stainless steel bar sink.
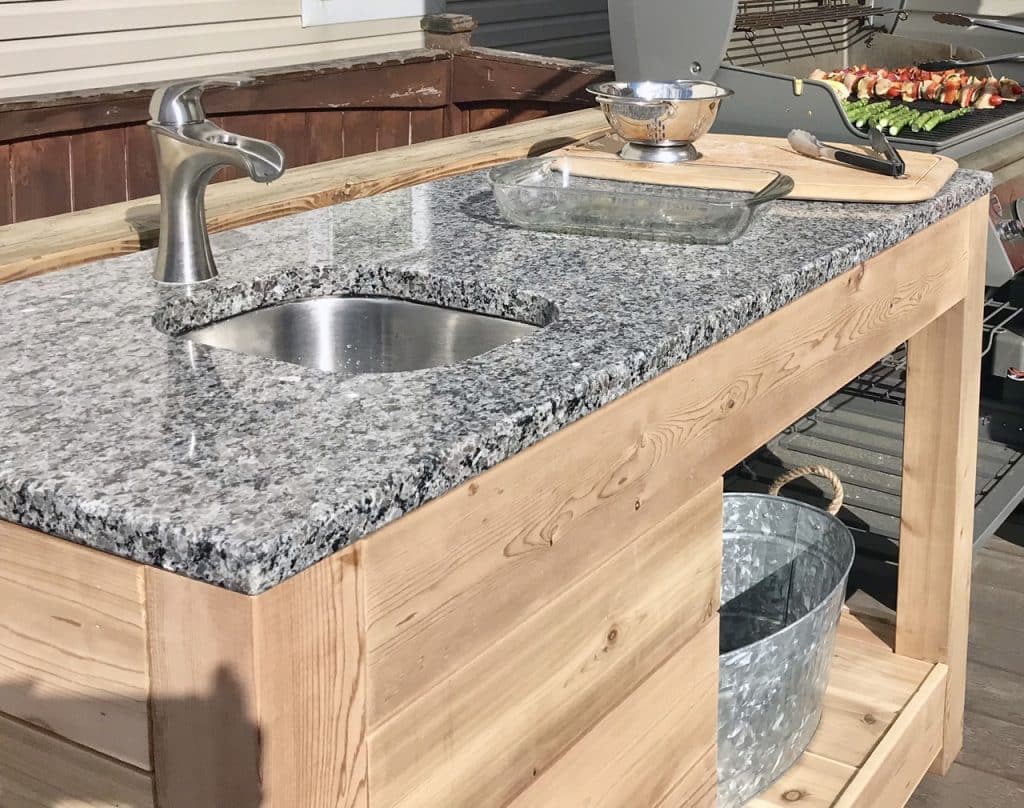
Installing the sink. For a streamlined look, we chose this sink that could be undermounted. First, it was attached using construction adhesive. Following that, we added a bead of caulk around the lip of the sink where it met the granite.
Check out more details on how to install an undermount sink.
Simple plumbing. Since the faucet comes with the attachments, all you need is a new garden hose and a Y-valve hose splitter.
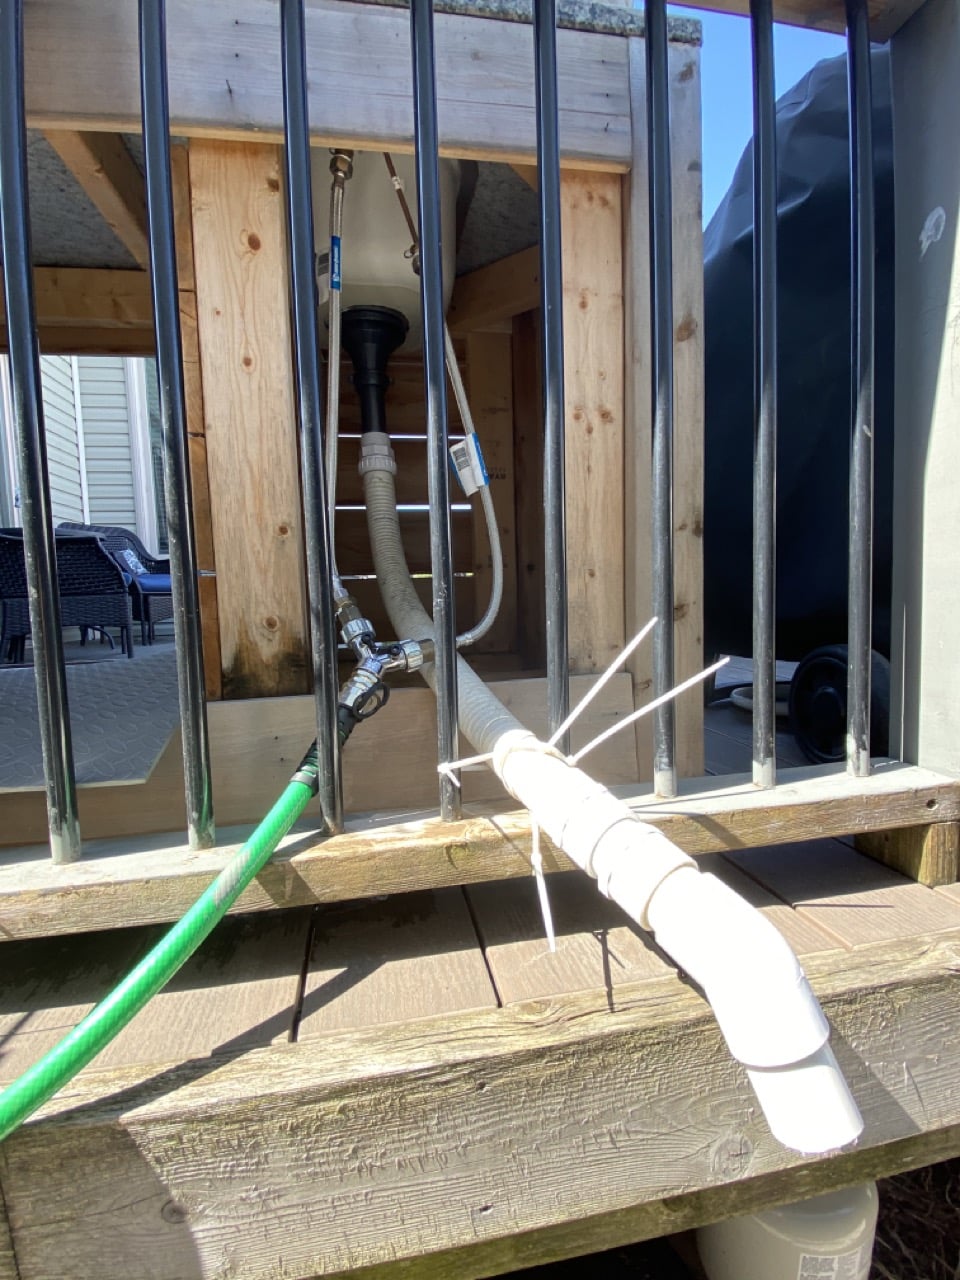
The first step is to attach the water supply to the faucet using the new hose and the Y adaptor. Next, attach the drain hose to the sink and allow it to drain out the back. Ours drains to the unused area behind the deck.
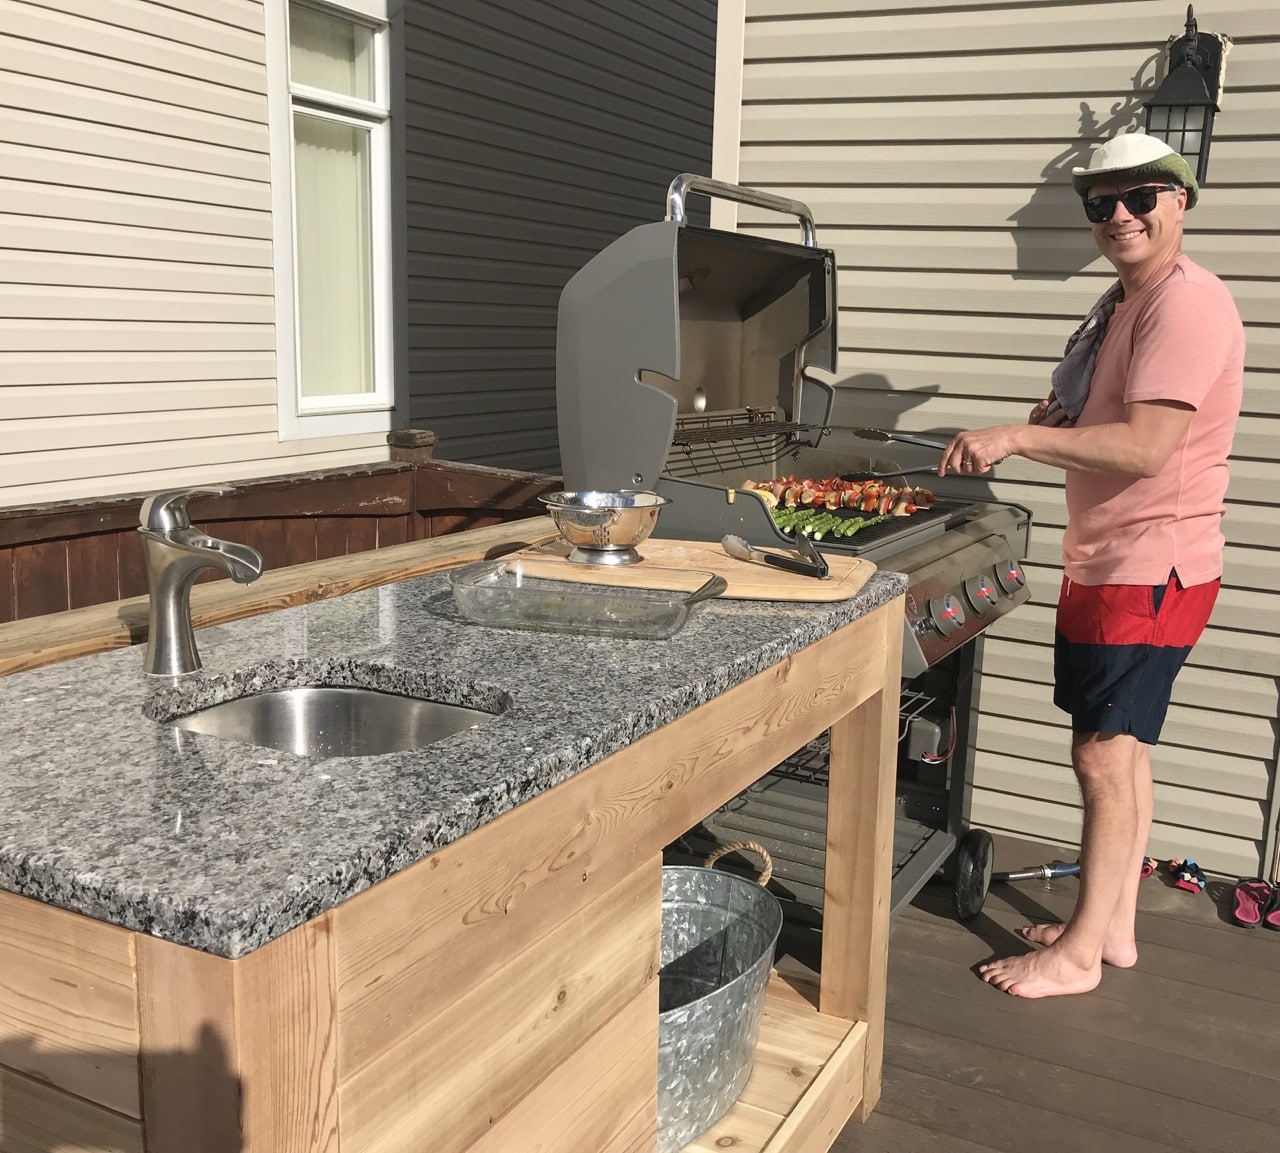
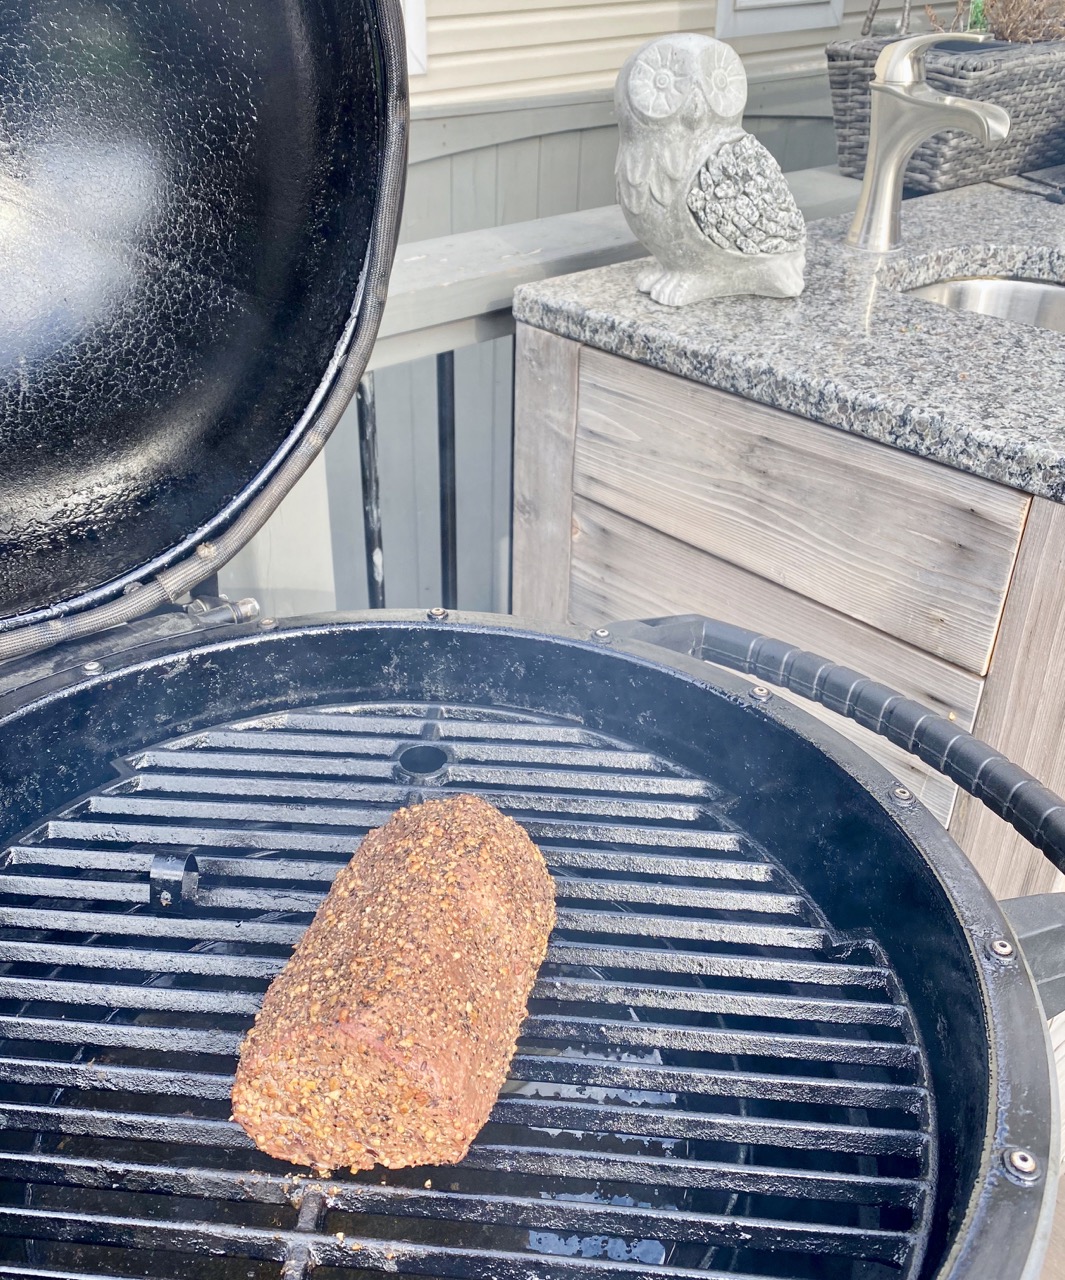
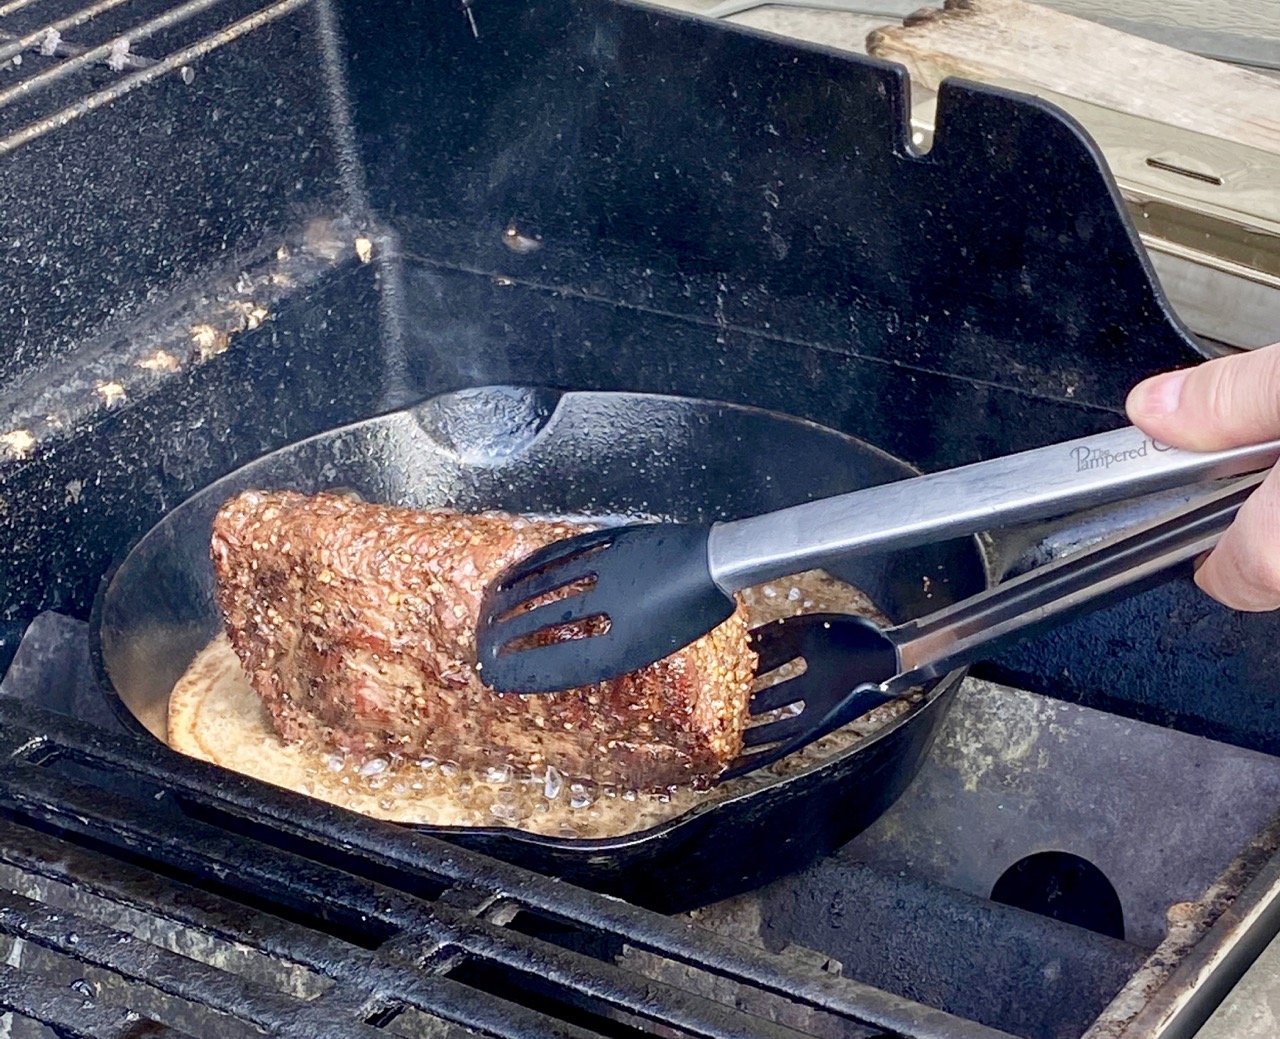
Grilling time!
Having an outdoor sink is super helpful when rinsing veggies or fruit for summer snacking.
Furthermore, the added countertop space is handy for meal prep or buffet style serving. And there’s even enough room for my chef’s summer drink of choice lol.
Both the BBQ and the Smoker get a full workout all summer long (and on warm winter days too!)
In the end, this DIY outdoor kitchen idea was one of our favourite Spring projects. It both elevated the look while enhancing the function of our backyard space.
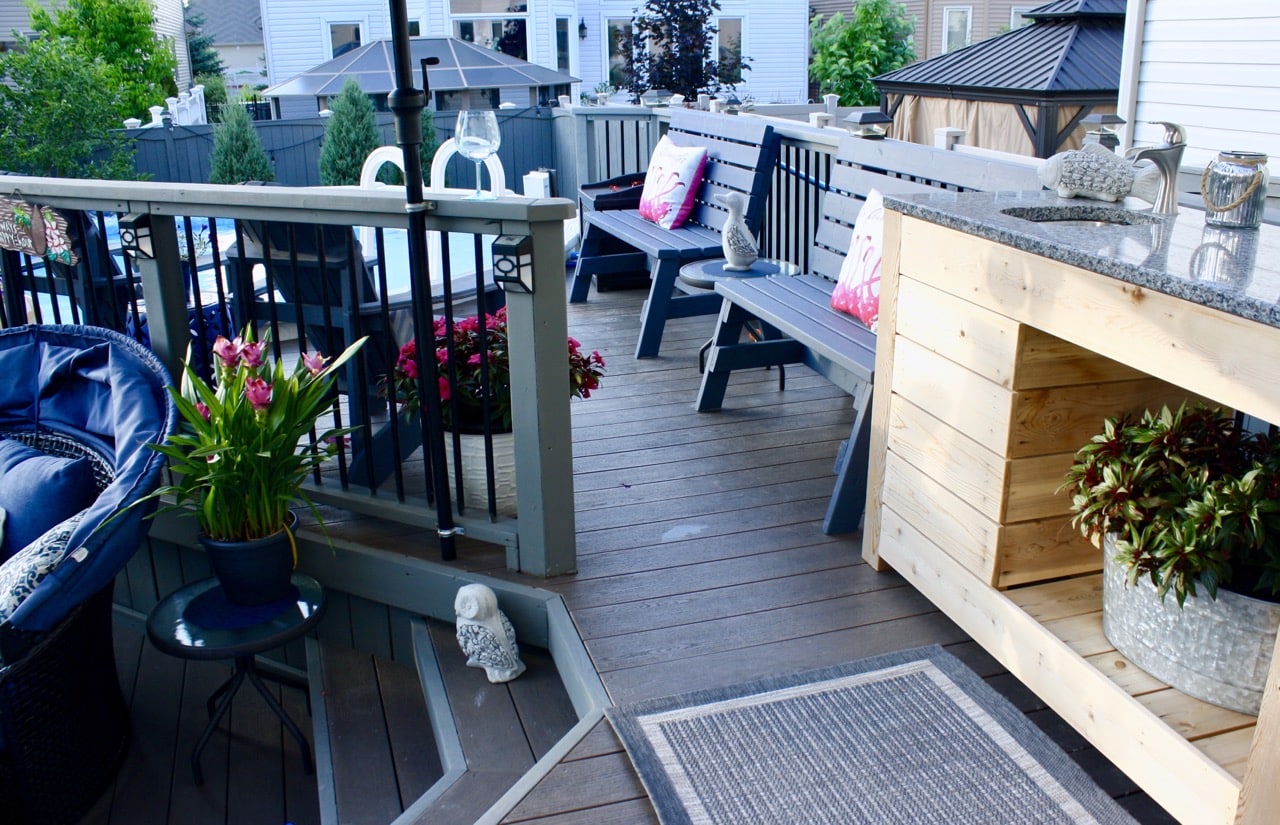
We finally have an entertaining oasis where we love to host family and friends all summer long.
No time to build? Check out this pretty wicker outdoor rolling bar cart option I love.
DIY ideas
If you liked the DIY outdoor kitchen idea, you might also like these other DIY projects.